I am so glad to have done the electrical system myself. Had I not, and something broke on the road, I’d have no clue how to fix it. Aside from that, learning how 12 volt DC systems work was fun and educational in and of itself.
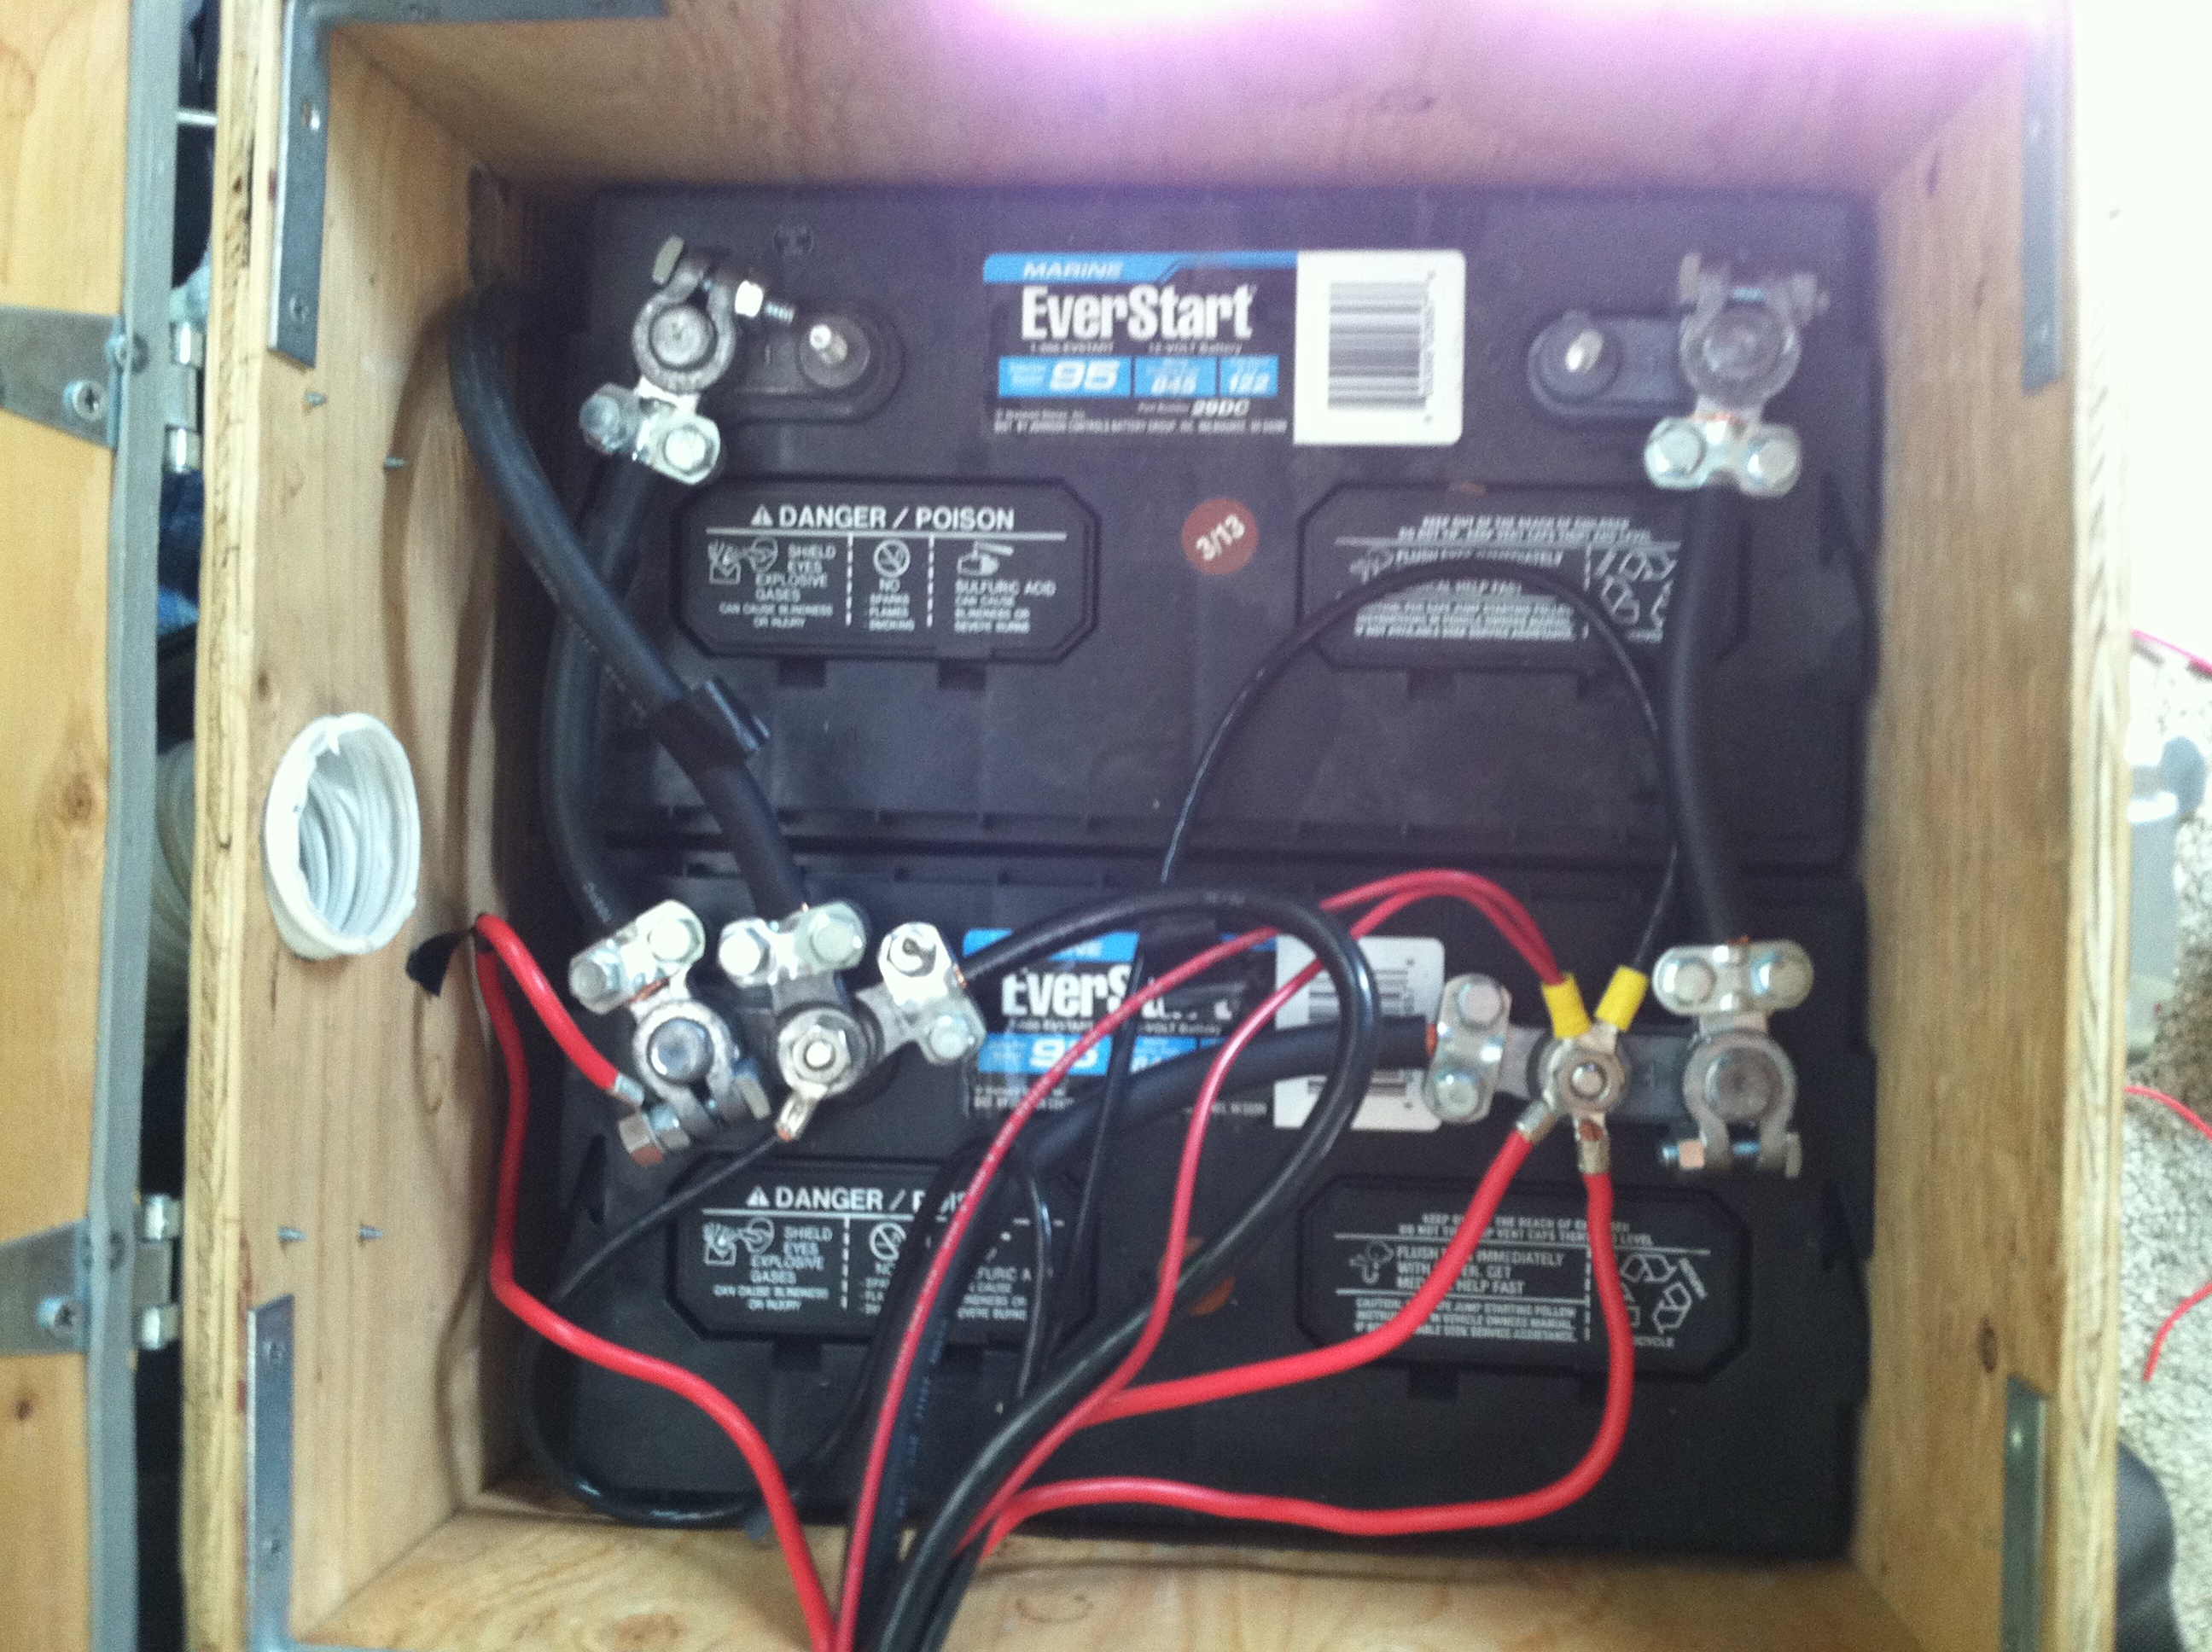
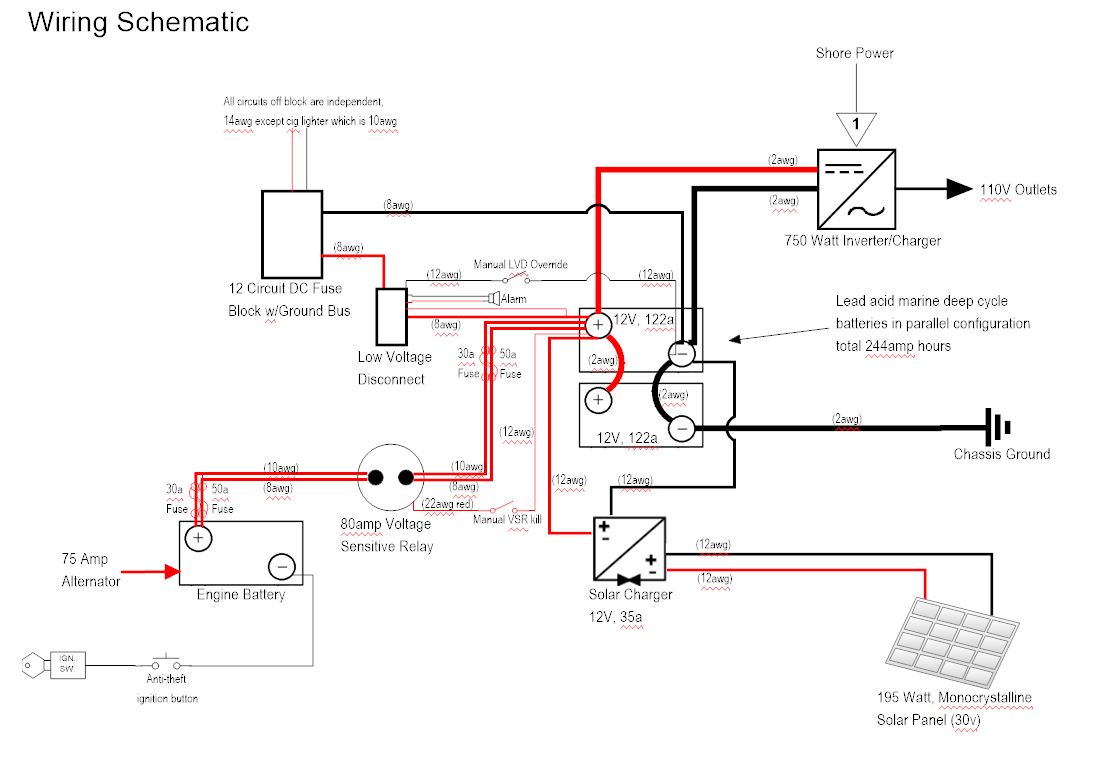
A brief recap: There are two 12 volt, 122 amp hour, deep cycle batteries in parallel located in a ventilated battery box. These batteries power overhead and kitchen lighting, ceiling fan, kitchen sink pump, fridge, stereo, and the cigarette lighter socket on the dash. Basically, any electrical component that is not essential to the running of the engine is wired to the house batteries so that we can listen to music and charge our devices and never have to worry about the engine battery going dead and leaving us stranded. The two house batteries can be charged via three different sources: solar, shore power, or via the alternator while driving.
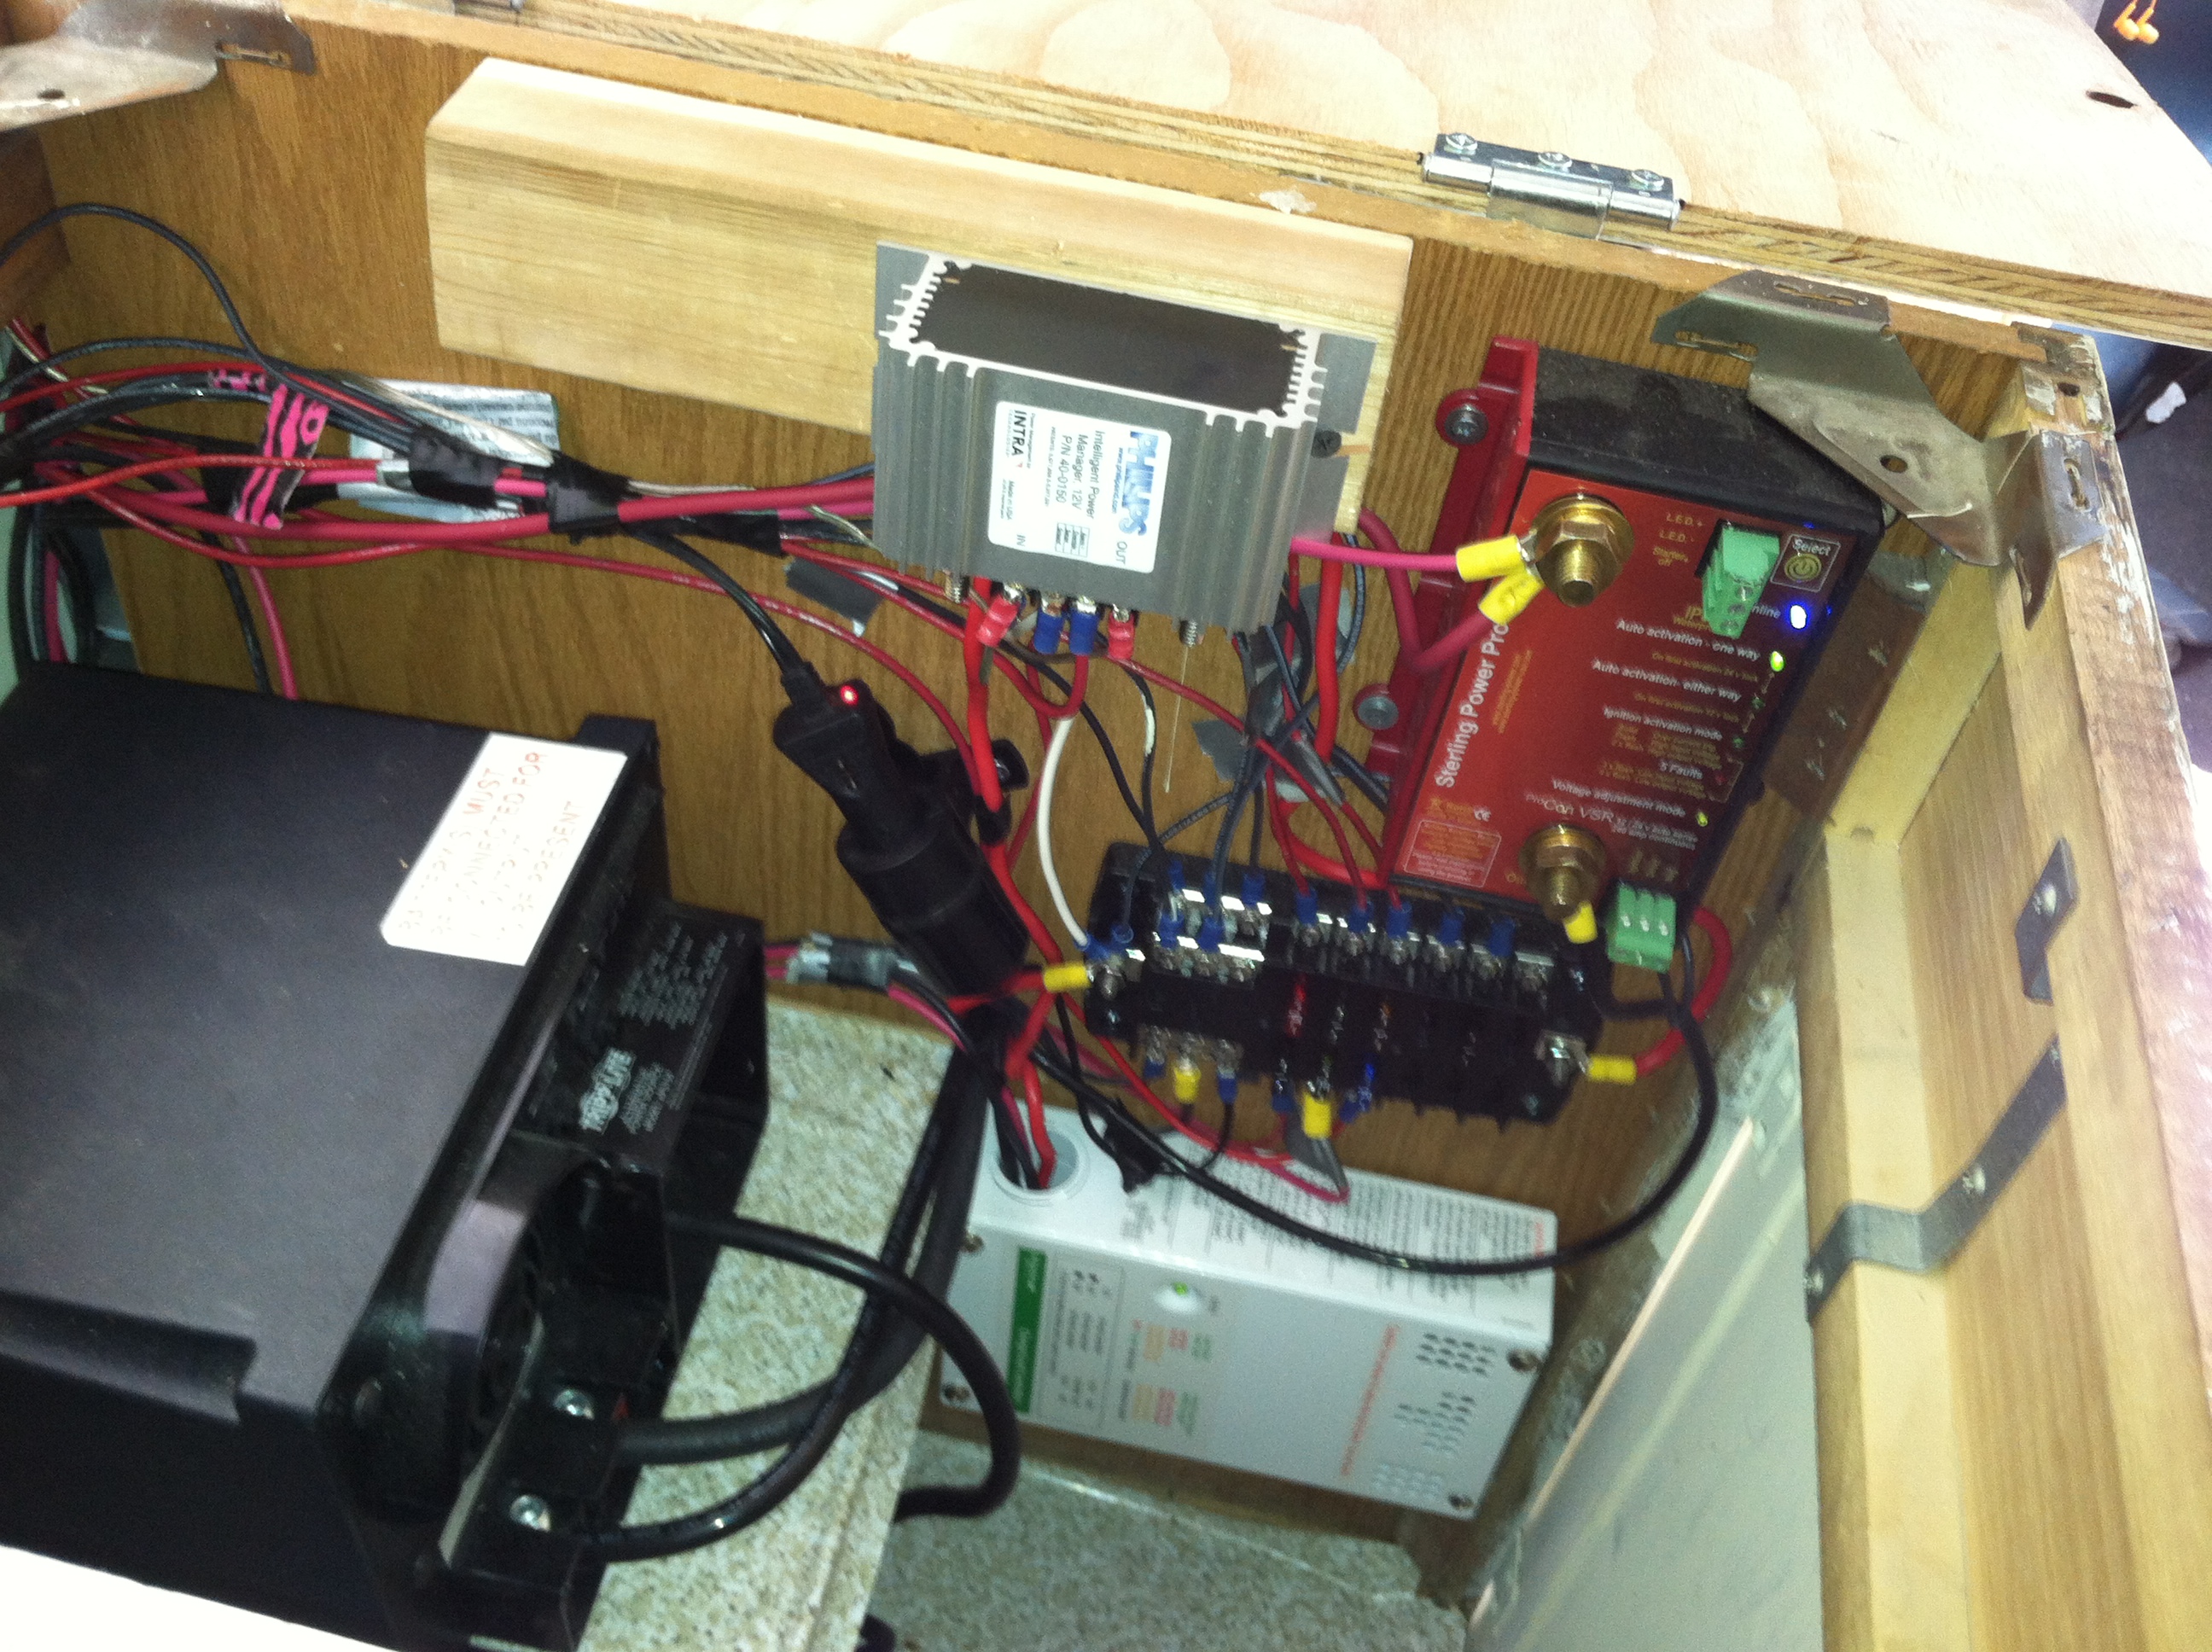
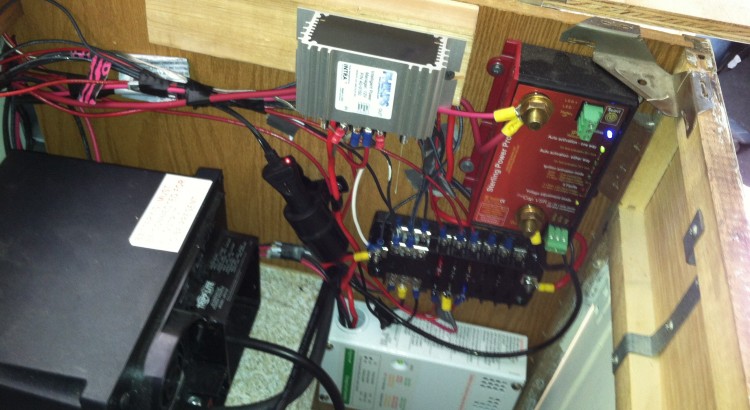
In the picture above the large black box is an invert/charger. This allows me to connect to shore power to charge the batteries and run AC/DC appliances off the batteries. The white box at the bottom is the solar charger. Above it is a fuse block for each individual wire run to an appliance or device. The last two devices are precautionary mechanisms for the electrical system that will be described in more detail below. The red device is a voltage sensitive relay for charging via the alternator. The silver device at the top is a low voltage disconnect.
The voltage sensitive relay senses when the battery in the engine is 100% charged. Then and only then does it open the relay and allow power from the alternator to pass through to charge the house batteries. This prevents your house batteries from killing your engine battery while still allowing for charging via the alternator. I wired a switch to this that allows me to manually kill charging via the alternator should I choose.
The thing about deep cycle batteries is that they are only good for so many cycles. The further you run them down in any given cycle, the shorter their life. As a general rule of thumb, one should try to never run it down further than 50%. When sizing your battery bank it should be double what you plan on using between recharges. Interestingly, most intelligent charging and component devices will not work AT ALL if they cannot sense a battery connected to them. In the case that you completely flatten your batteries this can be a major problem as even when you fire up one of your charging sources, the device will not pass the current along to the batteries because it believes there is no battery there to begin with. To avoid this, and to avoid hurting the life of the batteries in general I opted to purchase and install a low voltage disconnect device. I placed this device between my DC bus (which connects and fuses all of my individual runs to the batteries) and the battery bank. It monitors the voltage of the battery (which can be used to determine the percentage of charge the batteries have) and disconnects the DC loads when the batteries become 50% discharged. It has an alarm to let you know a few minutes before this will occur. When the device senses an increase in voltage of 1 volt (which means something is charging the batteries) it reconnects the DC loads automatically. Finally, I wired an override switch into it that will allow me to manually reconnect the loads in the case that I decide to deplete them past 50%. A great little device.
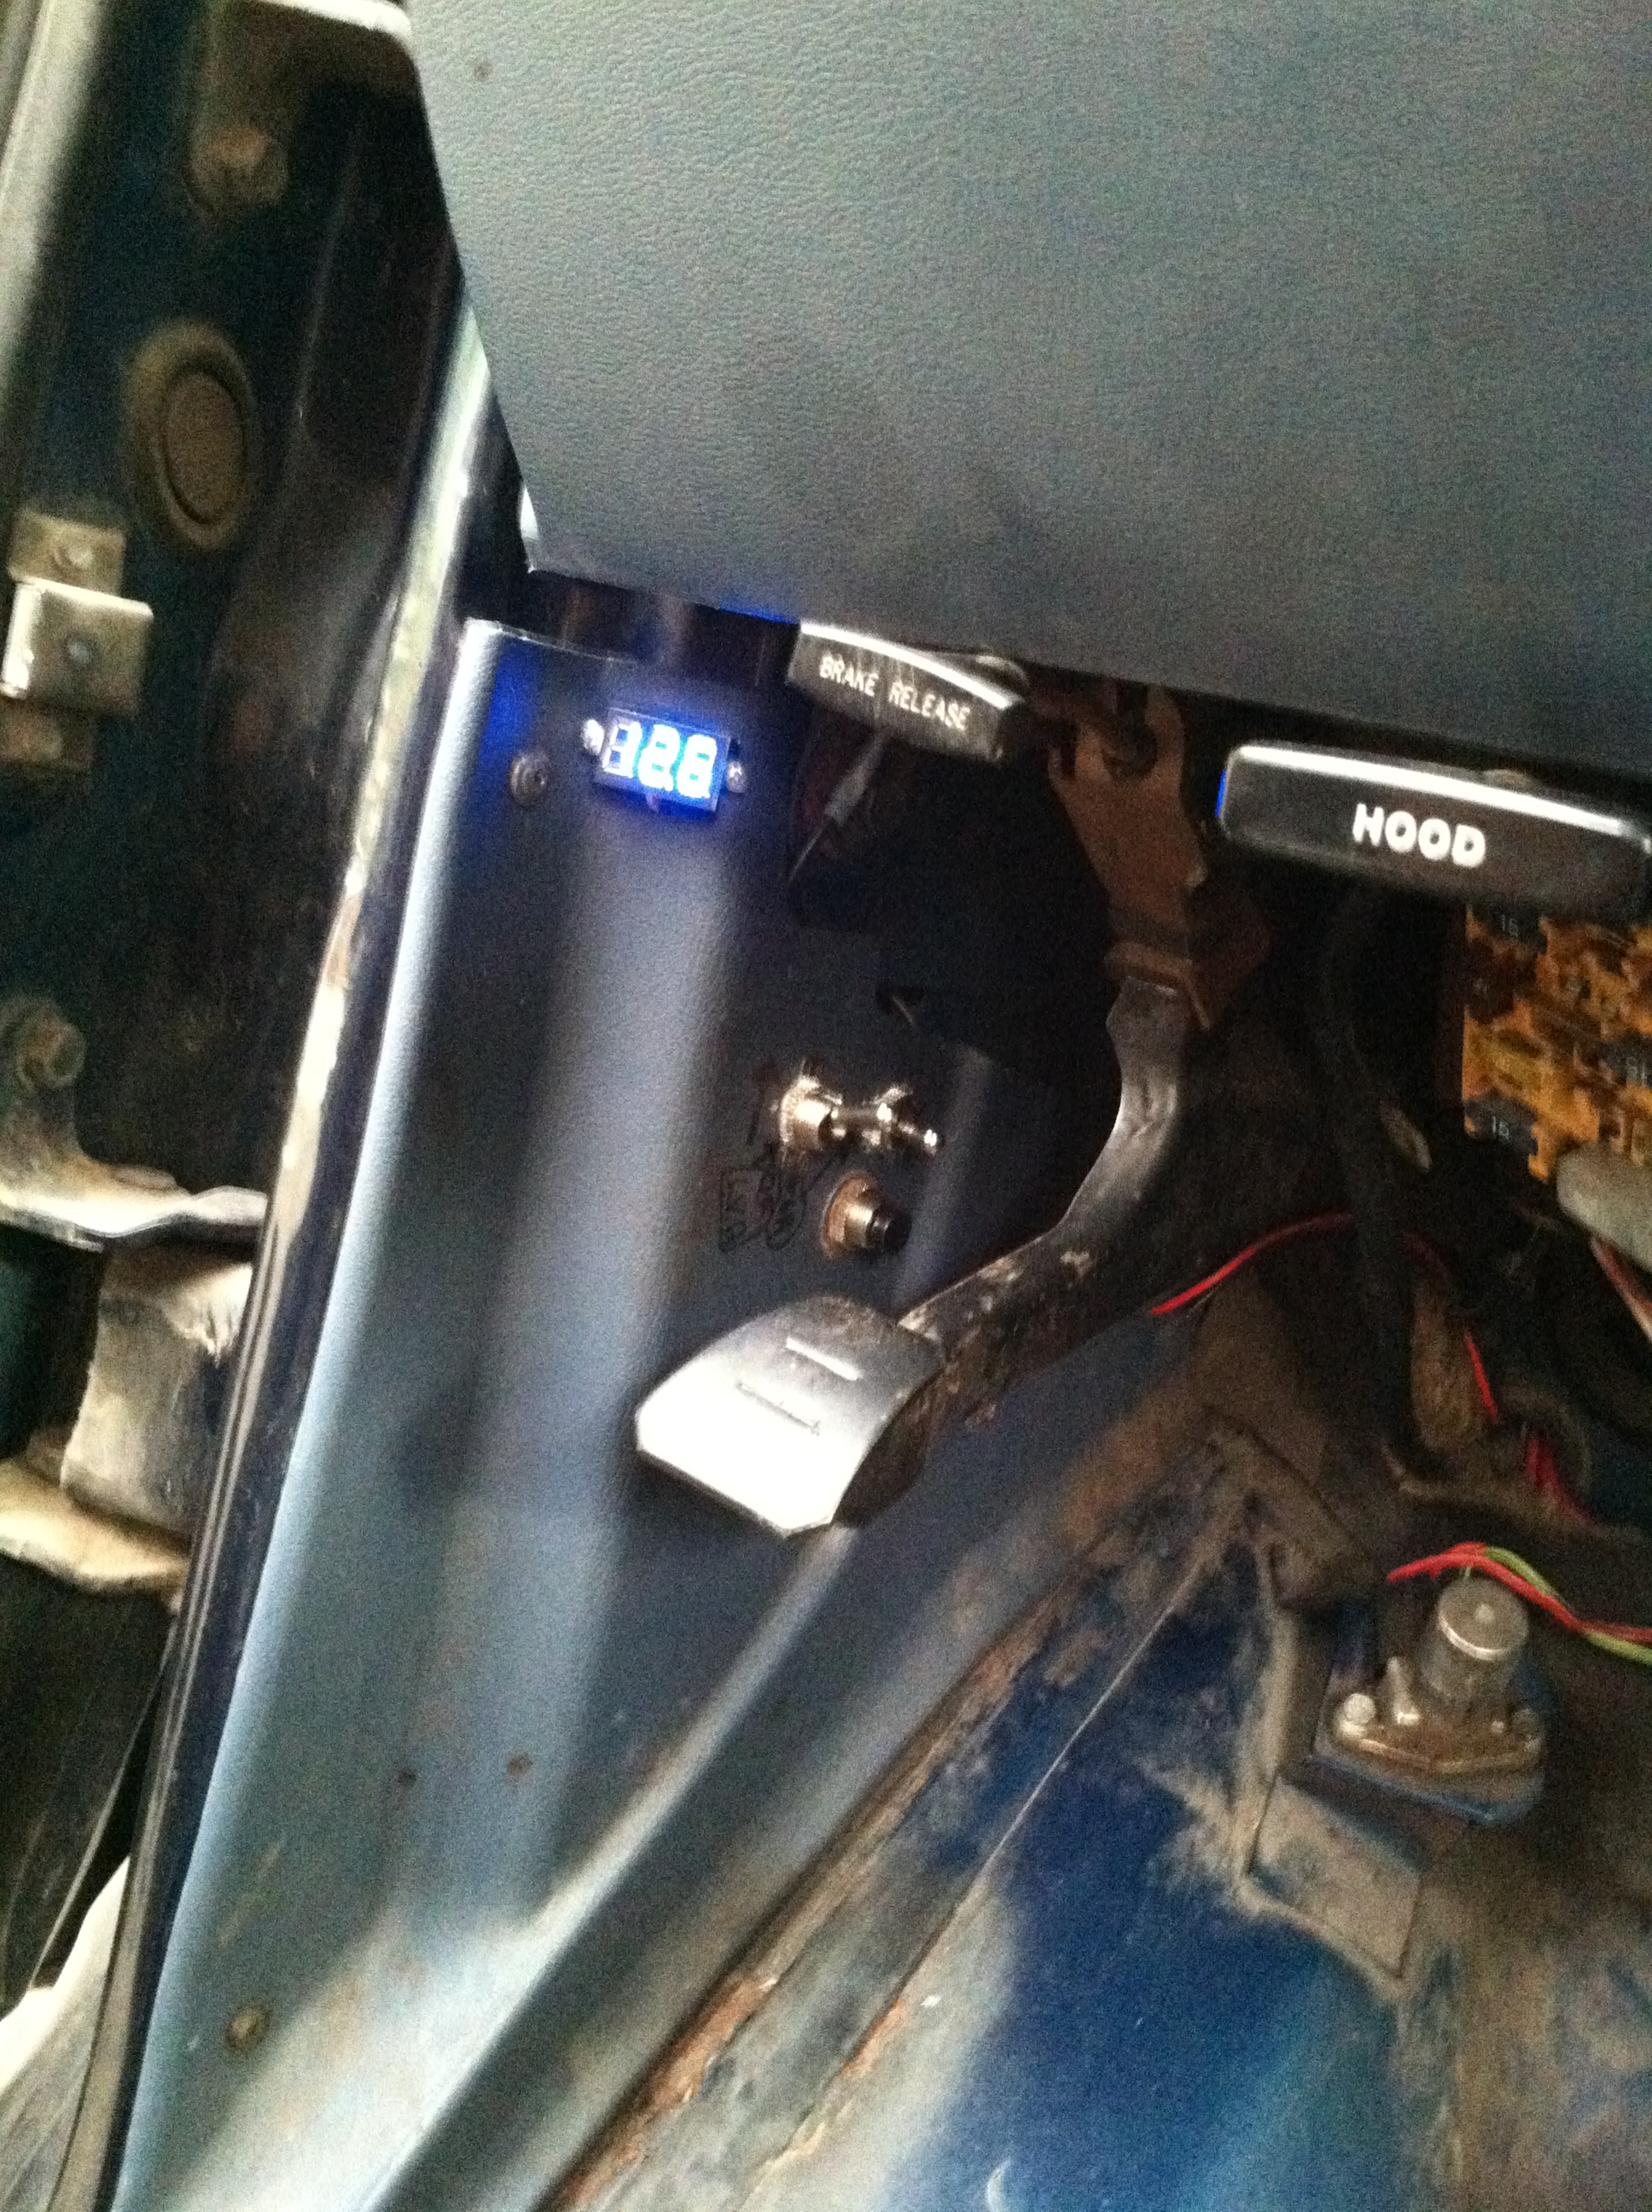
Finally, I wired a small volt meter into my dash near my switches so I can tell where things are at in a glance. Below you can see the volt meter, the low voltage disconnect override switch, the voltage sensitive relay kill switch, and the anti-theft engine starting button.
There are a lot of different wire sizes, fuses, and devices to keep track of – much more than my memory will retain over the months and years. I created a nice schematic to keep track of everything. This and all of the device manuals are in a plastic folder in the electrical cabinet.
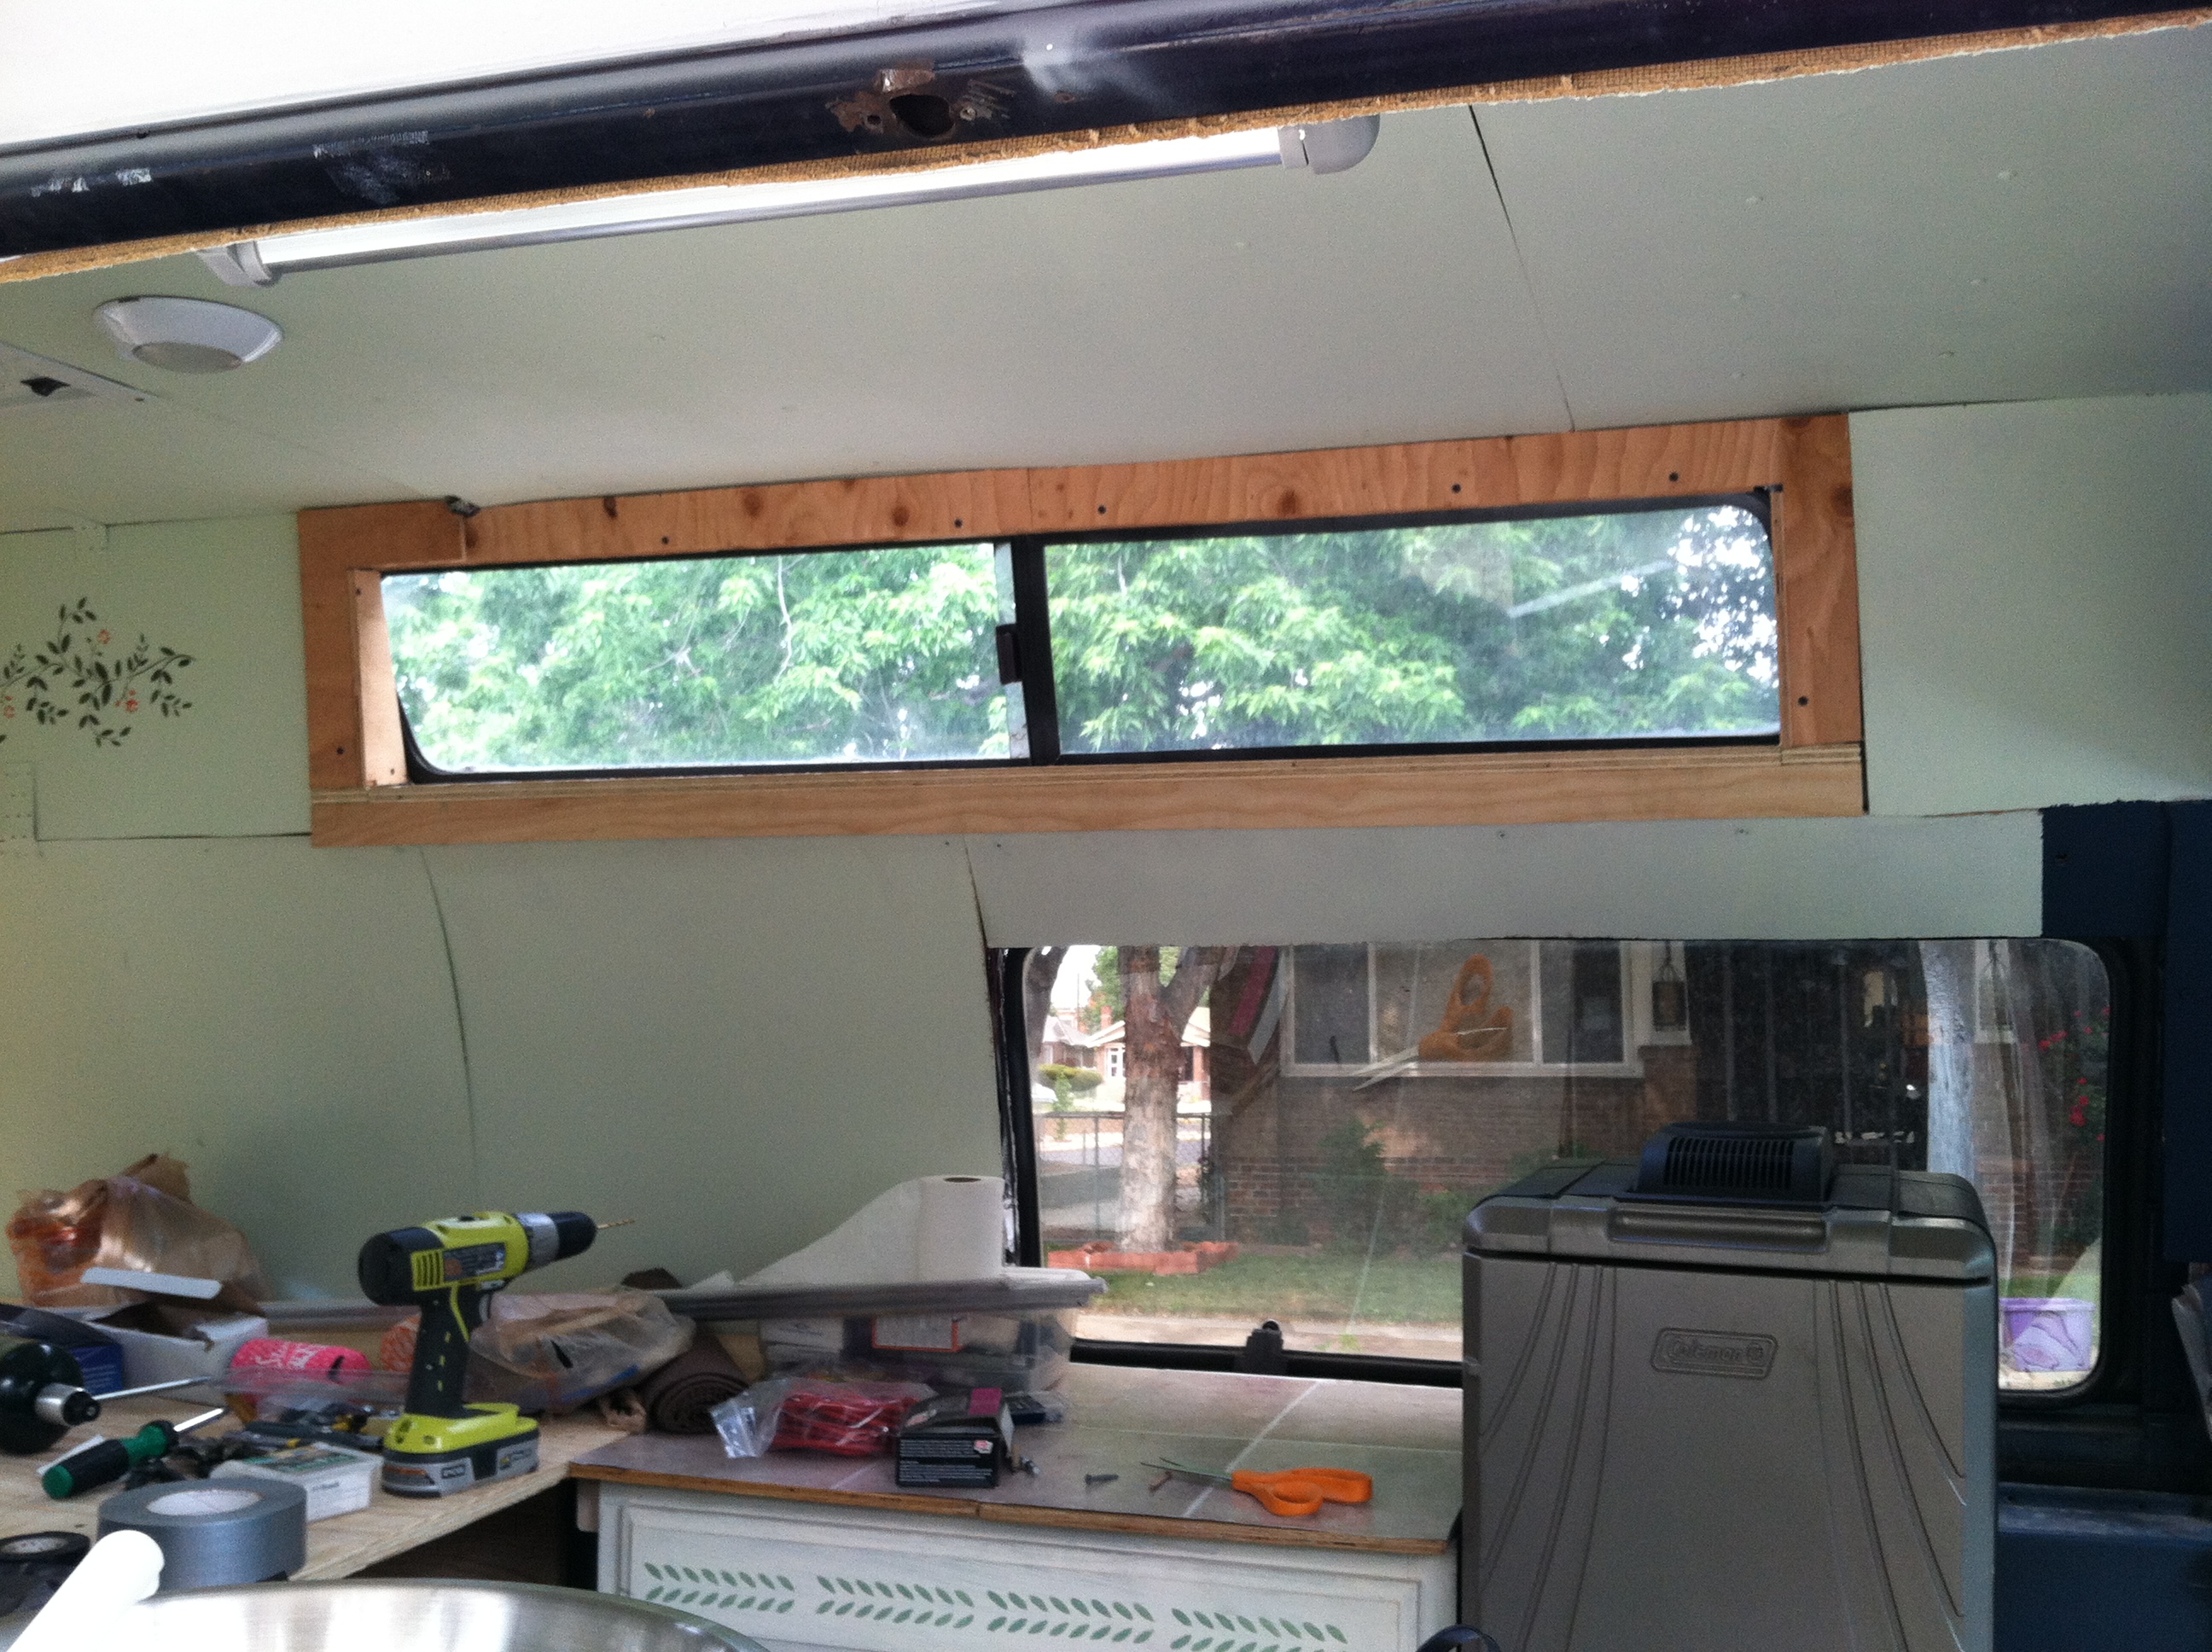
I built a custom shelf in the overhead compartment that I’ll fit with cargo netting after Niccole stains it. I also built a window box to finish the upper window and hide the insulation and wires. Both of these installations with allow for curtains to be installed in key places. Both were difficult builds as the van has some interesting shapes, contours, and an acute lack of places to affix things to.

We drove it to Wyoming a weekend ago for some climbing. It was a hot weekend and with no shade to be seen at noon it was nice to relax under the awning and have a cold, solar chilled beer.
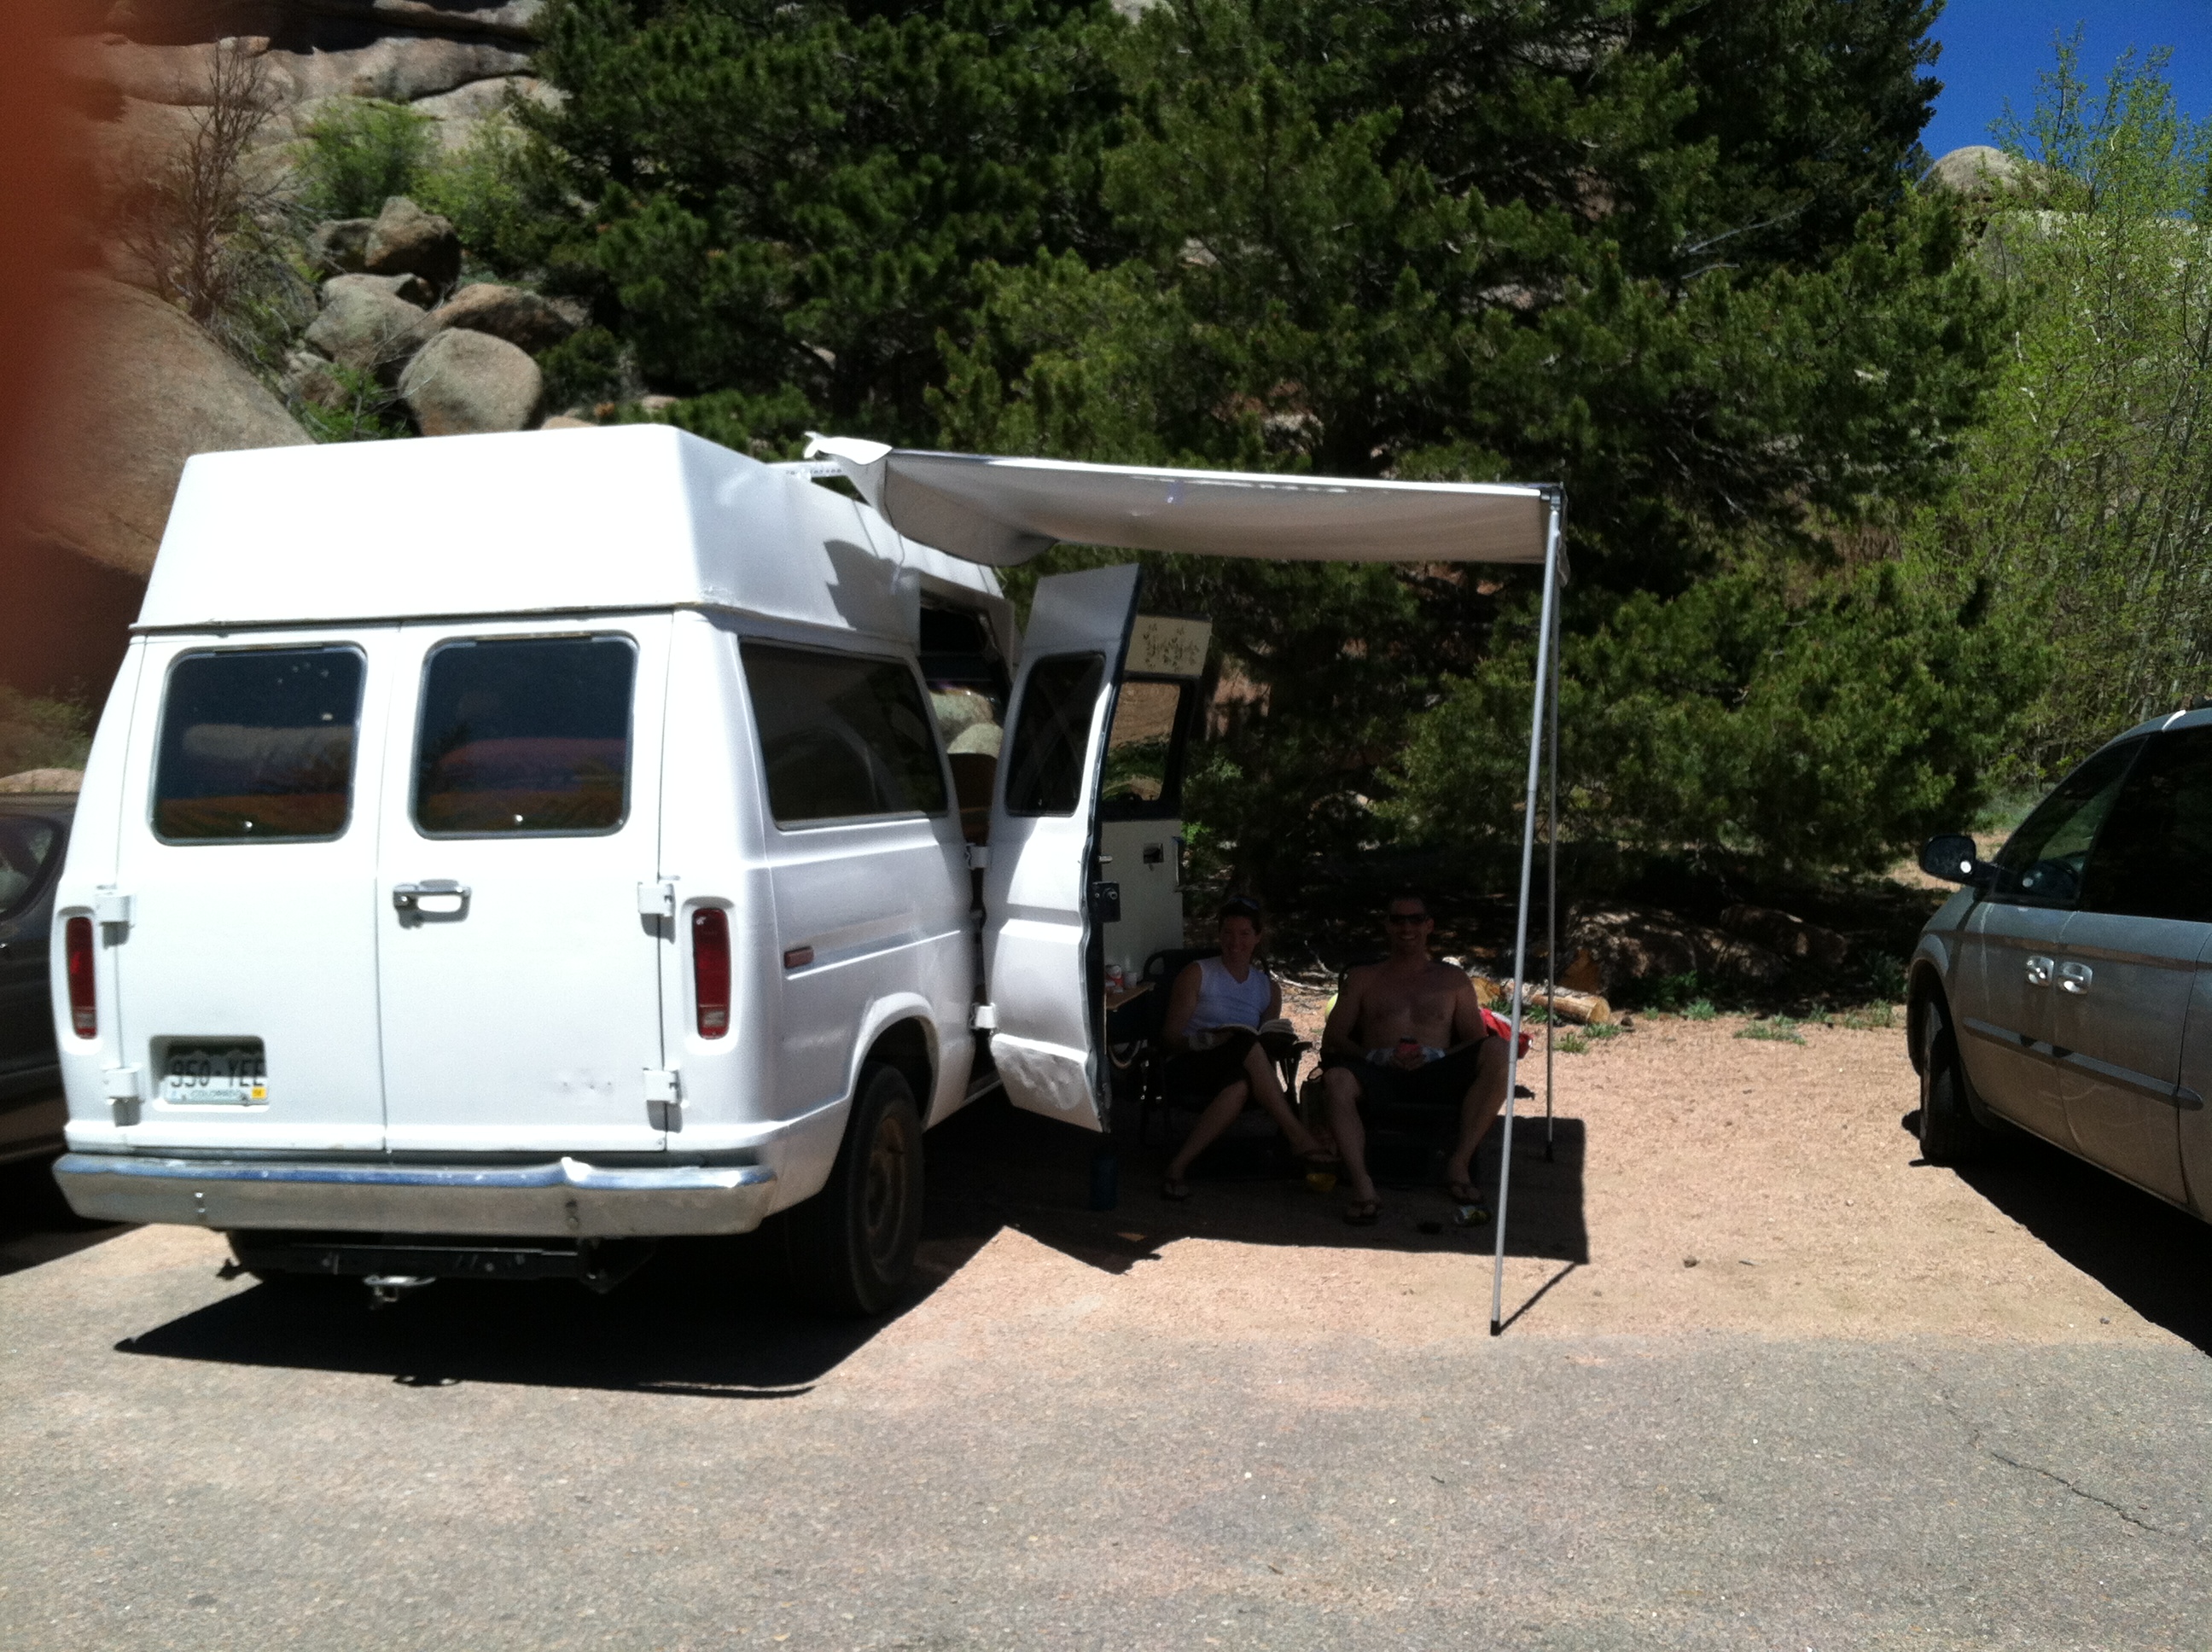
The van got quite a bit of attention from other climbers and passerby’s. Probably because it is so badass and sexy. One person was kind enough to snap a pic of us enjoying our new home!

Final numbers for electrical system:
| Electrical Components | |||
| batteries | 206.95 | ||
| voltage sensative relay | 88 | ||
| solar charger | 28 | ||
| new solar charger | 95 | ||
| inverter/charger | 199 | ||
| solar panel | 354 | ||
| solar panel mounting hardware | 14.66 | ||
| fuse bus | 42 | ||
| lcd volt meter | 8 | ||
| solar cable | 20 | ||
| roof connector | 10 | ||
| low voltage disconnect | 25 | ||
| wire and connectors | 100 | ||
| 1190.61 | |||
One thought on “Electrical Bliss”