
So I’ve been working on this aspect for months and to be honest, out of everything in the van it has required the most research and time to put together. It is a sweet setup though and I’ll do my best to document it here. This is going to be simply a design post as the installation of the various components seems to be progressing naturally in phases that coincide with other aspects of the build.
Here are the primary objectives:
- Run 12V DC appliances: Lights, stereo, fridge, water pump, ceiling fan
- Run 120V AC/DC devices: charge laptops, run power tools, etc
- Be able to live of the grid for extended time
- Charge batteries: plugged into shore power, solar panel, running engine/alternator
This sort of thing was 100% new to me. I really didn’t even fully understand the difference between normal residential AC/DC power and typical automotive DC when I began other than what the abbreviations stood for. The stumbling blocks for me were trying to determine how to spec each device out so that they would all play nicely with one another. The fact that you’re running things off of a power source that can be charged in three different ways, from three very different devices made it slightly trickier. Rating wires and fuses correctly also took a bit of time. Ensuring that you can charge from the alternator but not kill your engine battery is a potential stumbling block as well. Finally, finding deals on all of this stuff so that we didn’t have to drop a fortune into it took a lot of Internet shopping hours.
Here is the schematic I made to help better warp my brain around it (for the complete post-build schematic check out my post entitled Electrical Bliss):

I’ll address each bullet item individually…
Run 12V DC appliances: Lights, stereo, fridge, water pump, ceiling fan
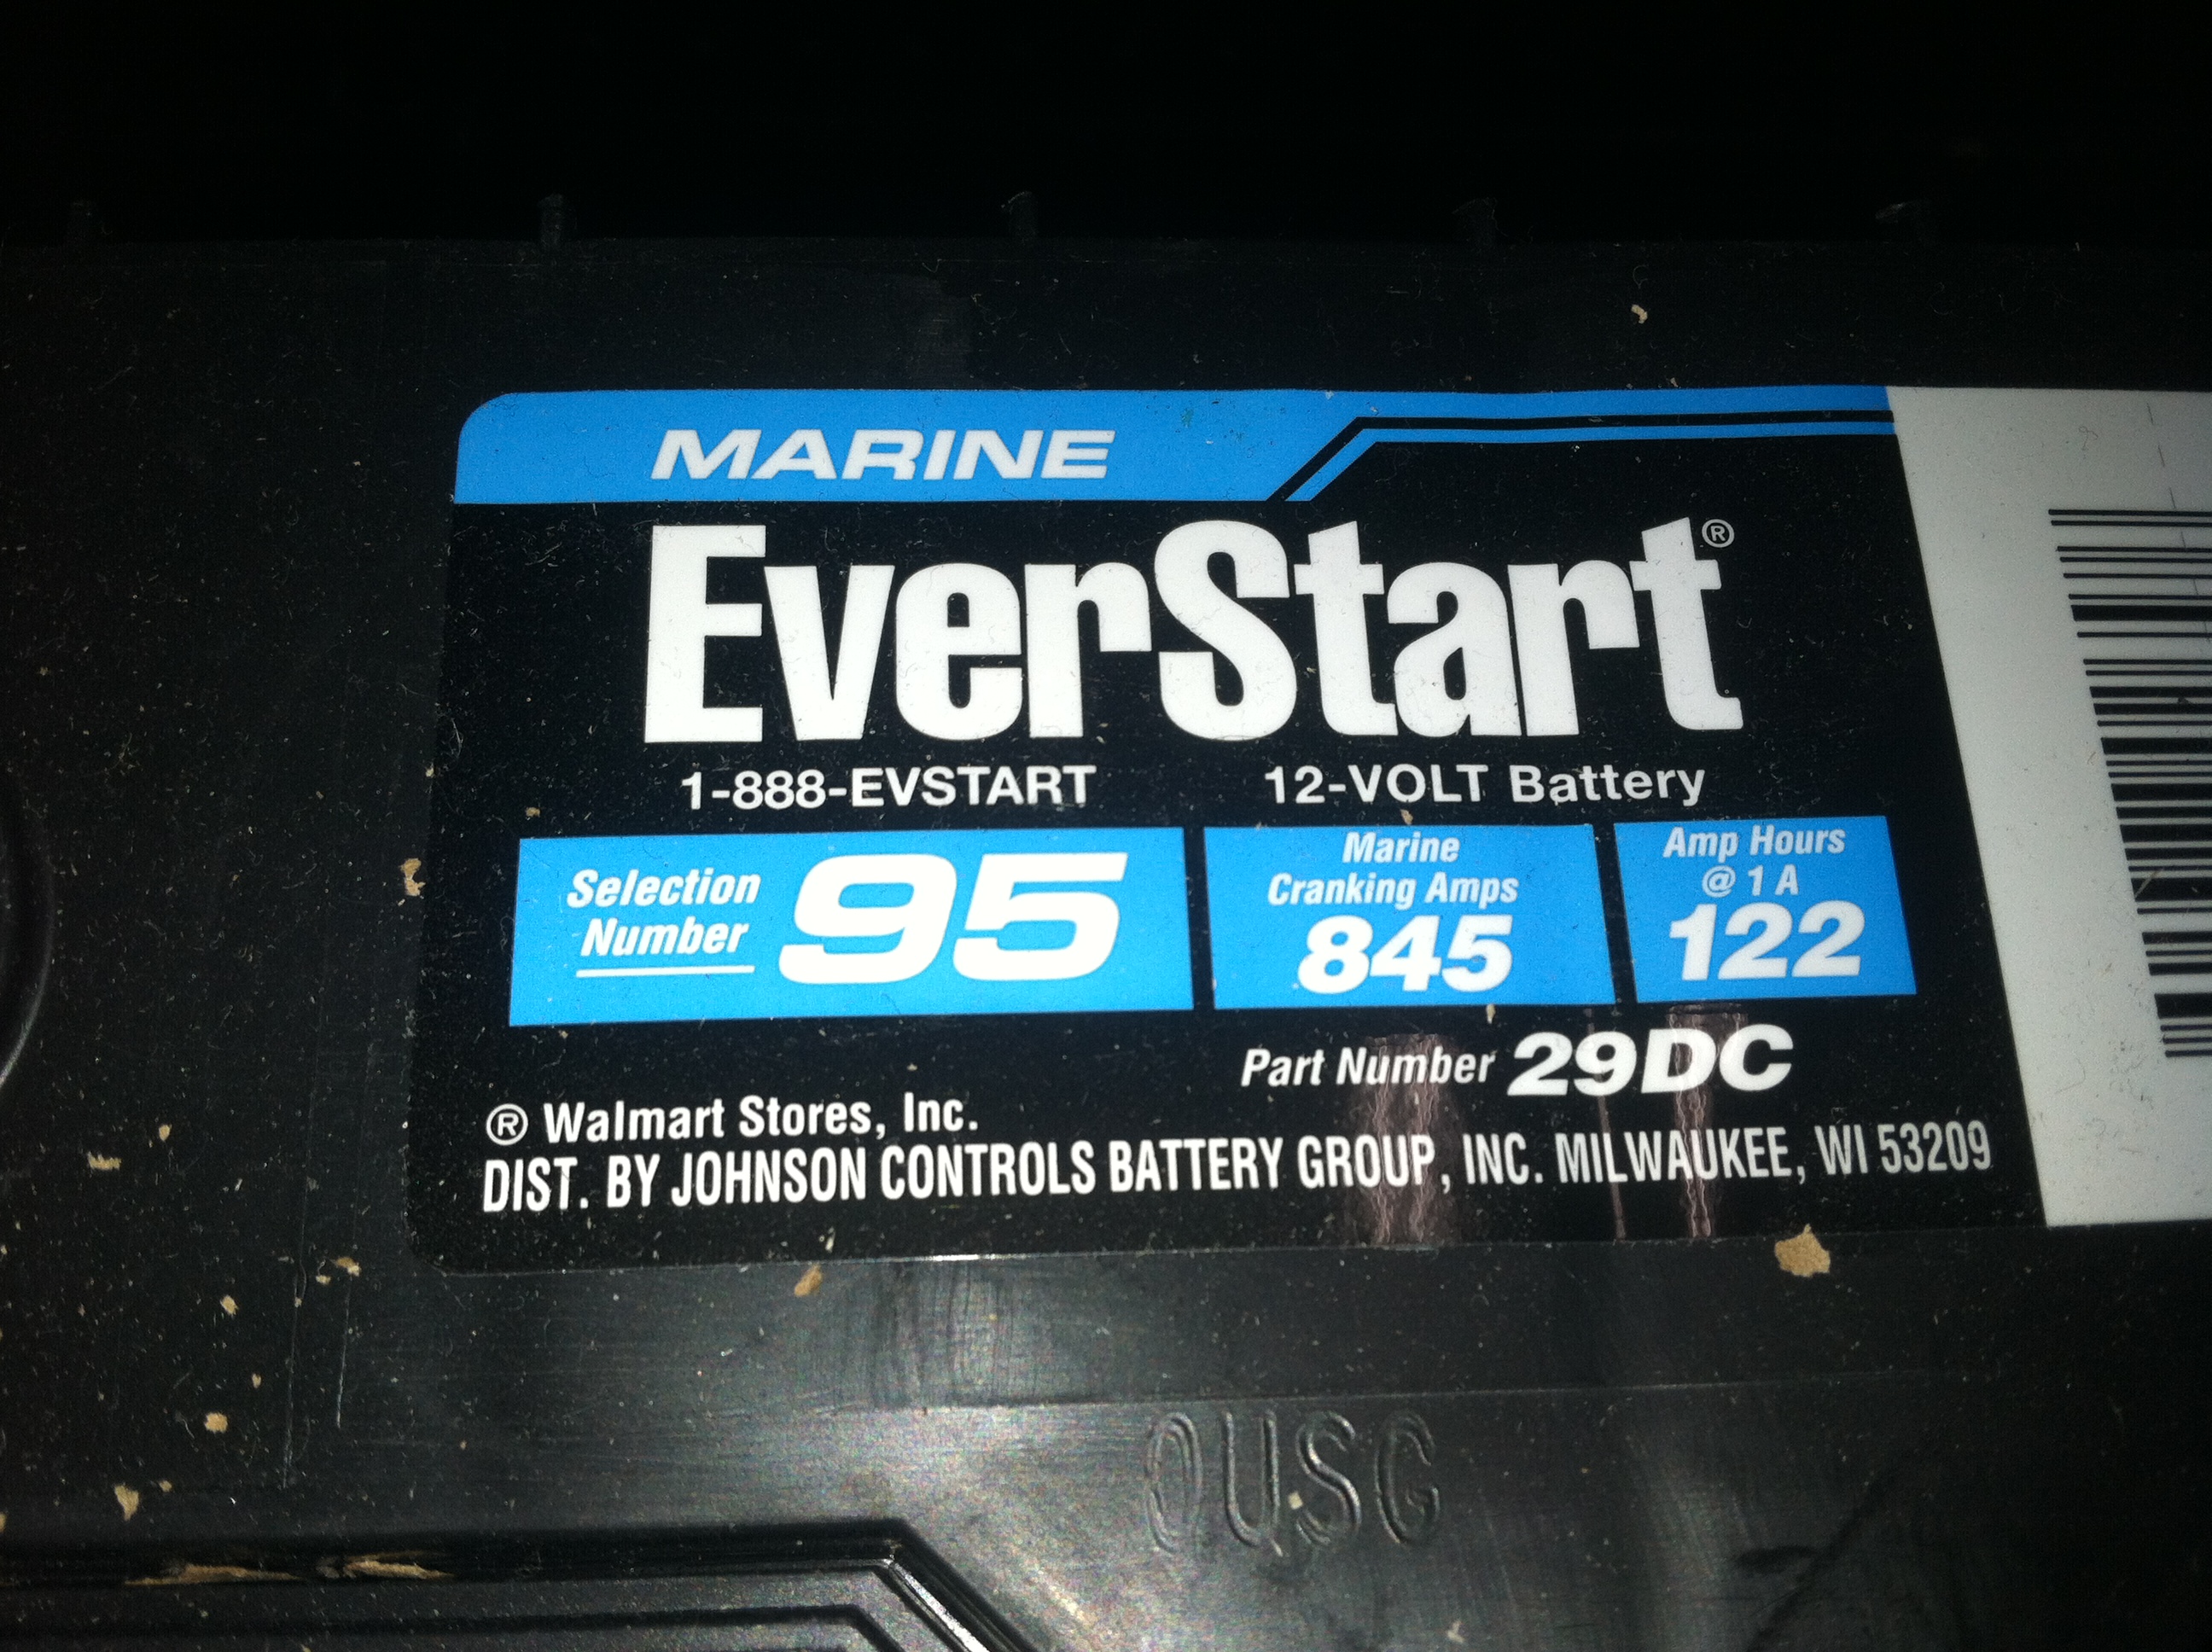
Everything we purchased was intentionally a low power consumption device to make the batteries last longer off the grid. The 12 volt compressor-style fridge will be the most demanding item drawing DC and the LED lighting will be the least. Devices running off the system have a rating called amps. This rating tells you how much power the device will draw from your battery bank in one hour’s time. There are very nice high tech batteries these days, and there are the good old fashion lead acid deep cycle batteries that have been used in boats, RVs, and gold carts since their invention. We opted for the latter because they are cheap though there are plenty of good reasons to spend extra money on your batteries! I snagged two 122 amp hour, deep cycle, marine batteries from Walmart for ~$90 a pop. When combined in parallel that will provide us with a total of 244 amp hours. Now, you’re not supposed to drain those past 50% on a regular basis so we’ll call it 122 amp hours of usable power. So from here, you can do the math: say we run all of our devices at the same time, it totals about 16 amps. So, say we’re running everything night and day 122/16=~8 hours. But, in reality, we won’t run nearly as much as that. The sink pump is only used occasionally. The fridge fan only kicks on when it needs to. We won’t use the lights during the day, nor all of them at night. We won’t have the stereo on 24/7 either and not necessarily at full power. In addition to that we’ll be charging the batteries even off the grid via solar. So at any rate, the bank size should suffice. I’ll be building a battery box to vent the batteries of explosive hydrogen in the case that they get damaged or are over charged.
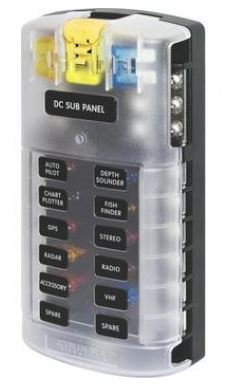
There will be a DC fuse block with individual leads going to each device. You rate the wire to ensure it can handle at a bare minimum the maximum draw of the device. You can always use a thicker wire than is called for. You then protect the wire itself with an appropriately sized fuse. There are lots of charts online that help with this process.
Run 120V AC/DC devices: charge laptops, run power tools, etc
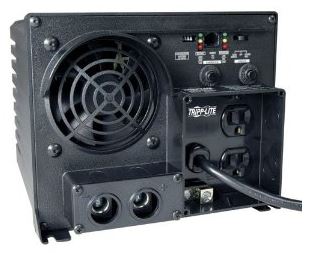
In order to do this you need an inverter which transforms your DC current from your battery bank into 120v AC/DC. Inverters do this a number of ways. The cleanest way is to have it make a pure sign wave, analogous to real AC/DC power. These inverters are the priciest and if you’re not running expensive electrical gear of other items that really need that sine wave to be pure the cheaper option is to get an inverter that mimics the sine wave closely which is the case in our inverter which is a modulated square sign wave. It provides up to 750 watts of continuous power, enough to run any typical power tool. It can handle peaks of up to 1500 watts though, like when a device with a compressor kicks on. For our purposes this beast is probably a little overkill, but due to some of the other features built into it that I’ll cover later, it was well worth the money.
Be able to live of the grid for extended time, charging via solar.
The first part of this equation , as mentioned earlier, is a place to store the power. The battery bank, given our minute power needs, is sized pretty well. But the uncertainty of how much we’ll be driving and have access to external power in certain parts of the world led us down the solar path. Solar is awesome. It’s green, it works all of the time, and after the initial cost, it’s completely free. I want nothing more than to be able to lay up on a beach for a week, not have to start the van once, and still have a cold drink in the fridge.
Solar is pretty easy at the end of the day. The bigger the panel(s) the more power you can save up in a day. We found a great deal on a 200 watt panel. Assuming our low power needs, the efficiency of newer mono crystalline panels, and the amount of sun we could potentially soak up around the equator, I suspect this panel will do more than just keep the batteries topped of. (Post trip edit: Interestingly, charging via solar near the equator is much less efficient than I initially thought it would be. The higher average temperature makes charging normal batteries less efficient and you’re actually much further away from the sun that you are, say, high in the mountains in Peru.)
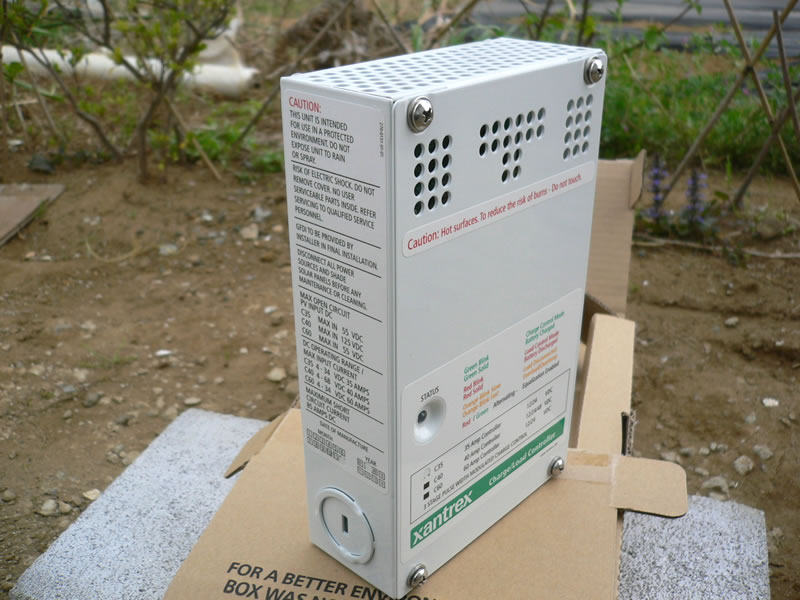
With any panel you’ll need a solar controller. This prevents the panel from continuously (over) charging a battery when it’s already full. More specifically batteries require 3 different phases of charging in order for them to last and be charged fully. Most solar controllers do this automatically. Pics of the panel can be seen in the post where I installed it. Here is the 15a controller:
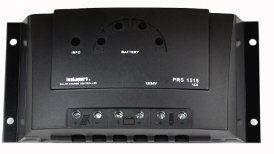
Edit: here is the new Solar Controller capable of converting 36 volts to 12 volts (I unknowingly bought a standard house solar panel rather than one designed for 12 volt systems so this is the fix). Xantrex C35 solar PWM charge controller. 35 amp max @ 12 or 24 volt:
Shore power
This goes back to the fancy inverter we bought. It also allows us to plug into a regular outlet at an RV park, friends house, etc. Two things occur when this happens. First, the items powered by the batteries via the inverter will now obtain there power from the shore source. Second, the inverter has it’s own built in three stage charger which will charge the battery bank.
Charging via the alternator
So this part is a bit more tricky than some of the others. The idea is that you want to be able to charge the house batteries via the engine running the alternator. This means the engine battery and house batteries will need to be on the same circuit. But if that’s the case and you flattened the house batteries, nothing will stop the engine battery from going with it. It’s also not rated for constant discharging like the deep cycles are which is why if you kill your engine battery too many times it won’t take a recharge and needs to be replaced. Also, you don’t want to be charging your house batteries when your engine battery is in need of a charge. There are many different ways to deal with all of this. I chose a voltage sensitive relay here. It makes the circuit one way, preventing your house batteries from ever drawing off the engine battery. It also checks the engine battery and ensures it is at a full charge before it will open the relay and allow the house batteries to charge.
Summary
So there’s the basic design and major componentry. It’s always a little nerve racking when you know in advance that a mistake in your calculations could result in a fire, and that it might take place in a very small area that in a short time will be 100% of our home. So, extra diligence and research was required. Certainly not a place to wing it. With the venting of the battery box, the correct fusing and wiring, and having kill switches in certain key places, I’m confident that we’ll have a nice, trouble free experience. Time will tell.
As I mentioned before, the installation of the different pieces will be included in other posts or posted separately from this post. I wish I could just install the entire thing and try it out but it’s not quite that simple when you factor in other ongoing projects and parts of the build.
Here’s a list of the major parts and the places that happened to have the best deals on them at the time I was searching. Not bad for under a grand. (Edit: Solar charger upgrade pushed us just over a grand… barely).
